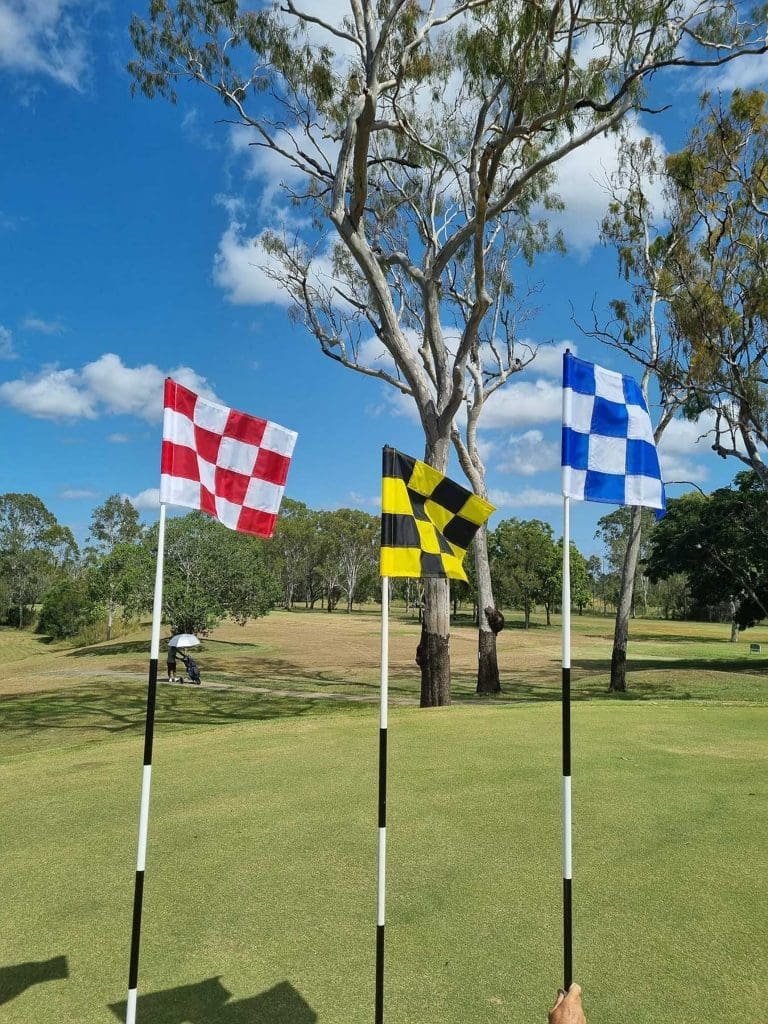
Calliope Golf Club has new flags thanks to the Calliope Vets.
Red front, yellow middle and blue back.
This hole is a dogleg left. The aim line for the drive is as close as possible to the grass knoll at the end of the fairway. This will give you a clear shot to the green avoiding the large gum tree protecting the green.
Drive to the right hand side of the fairway to open up the green. This will give you a clear shot to the green.
You need to shape a draw at the middle of the fairway around the hazard to avoid running through the fairway. 2nd shot to the left half of fairway gives you an open 3rd shot to the green.
The line to the green is narrowed by trees lining the fairway. Generally, club selection is influenced by the breeze. Take one more club than you think.
Prevailing winds makes this hole play longer, however the best miss is short as green runs away from both sides and back.
Dogleg left. Water hazards on the left and right off the tee and your best option is a draw down the middle. The green is narrow and elevated so best to come in high.
Tee shot to the right half of fairway will roll to middle. Second shot at the green needs to be straight as green rolls off both sides and back.
The tee shot must land on the green or you will be severely disadvantaged. Gum tree protection on the left side and good bunkering on the right. Always take one more club than you think.
Nice little par 3 but you need to make sure you have plenty of club as it sits atop a steep bank. Prevailing wind also needs to be taken into consideration.
Toughest par 5 on the course. Aim point off the tee is slightly left of the big gum tree. A second shot layup with a mid to long iron will ensure you get to the green with your third shot.
This is a long hole that, with length, you can take on the edge of the roadway as your line off the tee. This will bring you to the middle of the fairway and open up the second shot to a wide area. Approach needs to be accurate to the very flat green.
A very long par 4 with hazards both sides of the fairway. Most golfers will be hitting a blind second shot with a fairway wood or long iron to a wide but shallow green set at an angle to the fairway and protected by a grass mound in front.
This is a par 5 for the ladies and a good tee shot to the middle of the fairway is required. Second shot again just needs to be in the middle to open up a nice approach. The green is very narrow and shallow so important to get third shot at the flag area to avoid difficulty on the green.
An uphill blind shot to a generous green. Aim at the Norfolk pine tree behind the green and you won’t be far away.
Medium length par 3 with the green at the top of the hill. You can play this hole one club short to avoid rolling over the back. Be sure to aim to the right half of the green to avoid the natural terrain rolling left.
Easiest hole on the course. Aim down the right of the fairway as the terrain feeds left all the way to the green. A deep bunker guards the left of the green.
Shortish par 5 but accuracy to the right half of the fairway is required to avoid the natural roll to the left on both the tee shot and second shot. A tier in the green requires you to get into the right section for easier putting.
A good risk/reward hole with a slight dogleg to the green. The green is approached over a wide valley and sits at an angle to the fairway but be careful the green is very shallow and OOB lurks close behind.
A nice little dogleg right after the tee shot to the middle of the fairway. Club selection important on the second shot as the green is narrow above a large gully and OOB is over the back.
Longest and hardest par 3 on the course. No real perils await except the OOB down the left side. The prevailing breeze is usually in your face so take one more club.
A long par 3 that requires accuracy with OOB along the left hand side.
Very short hole. OOB down the left side with a bunker guarding the right. Two grassy mounds guard the green with OOB at the back so don’t go in long.
A nice drive towards the fairway bunker will roll towards the middle of the fairway with the natural slope. This will allow a clear second shot to the green which needs to be the right club as OOB over the back.
Difficult driving hole. Usually the wind is into you from the left with OOB to the left for the entire hole. The green is elevated with a deep bunker catching anything short right.
A long par 4 that requires accuracy off the tee. A good strike will have you rolling down the hill. Second shot uphill to a green set into a hill. Good club selection required as anything short will not make the green.
A dogleg left, with the best line off the tee up the right-hand side if you want to attack the green with your second shot. If left, layup to the 100m mark for a clear shot to the green.
A tee shot just inside the right hand tree line as the fairway slopes heavily to the left will allow for an open second shot. This shot needs to be played to the left half of the fairway as it will roll towards the right hand side of fairway. Approach shot requires attention to the very long green running to the right.
Another good birdie chance. A generous fairway but a visually intimidating 100m carry over the creek. The green can be reached with a good second shot, but the green is narrow and ramped and protected by bunkers on both sides.
A little fade required off the tee to carry the right hand tree line or you may run out of fairway. Critical club selection on the second shot as the green slopes heavily off both sides and the back.
A mid length par 3 across a creek to a generous green. No hazards near the green just the creek to carry.
A nice little par 3 over the creek. Not too much to think about with a nice big green.
Another tough driving hole. The tee shot is straight forward with a large gum tree to be avoided. Anything short will feed to the right. The green is guarded by a large gum tree and the green is also narrow and elevated. Tip for putting on this green, aim at the hole because it doesn’t break as much as you think.
A tee shot in between the two large gums will give you an approach up the green. Another long green that without accuracy will run away at both sides.
Tough finishing hole. The tee shot is usually into the wind with bunkers guarding both sides of the fairway. Aim at the left bunker off the tee with a fade. This will give you a clear view of the green. The second shot is across the creek to a large two tiered green with a mid-short iron that will test everyone. For those who can’t reach the green, a layup just short of the creek will give easy access to the green.
A nice long finishing hole. With length you can aim at the right hand bunkers with a draw to the middle of the fairway. The green is reachable in two with confidence over the creek for second shot or you can lay up short. Either way approach is critical to get the ball onto the right tier as this is a very large green with many undulations.